

Understanding the Importance of Sketching in Logo Design
Sketching is an essential step in the logo design process that allows designers to visualize and explore ideas before committing to a final design. It serves as the foundation for the entire creative process, providing a platform to experiment, iterate, and refine concepts. Here’s why sketching is crucial in logo design:
Visual Exploration and Concept Development
Sketching enables designers to explore a wide range of visual ideas quickly. By putting pencil to paper, they can freely experiment with shapes, typography, and symbols without the constraints of digital tools. This freedom allows for a more organic development of ideas, fostering creativity and innovation. Through sketching, designers can visualize different interpretations of a concept and identify the most promising directions to pursue further.
Speed and Efficiency
One of the primary benefits of sketching is its speed. Creating multiple sketches in a short amount of time allows designers to generate numerous ideas rapidly. This efficiency is particularly useful during the brainstorming phase, where quantity often leads to quality. By sketching out several concepts, designers can quickly evaluate what works and what doesn’t, saving time in the long run by avoiding less effective ideas early in the process.
Problem Solving and Refinement
Sketching is a powerful problem-solving tool. It allows designers to work through potential issues and challenges in a visual manner. By sketching out different solutions, designers can test various approaches to a design problem and refine their ideas. This iterative process helps to identify strengths and weaknesses in each concept, leading to a more polished and effective final design.
Communication and Collaboration
In a collaborative environment, sketching serves as a valuable communication tool. It provides a visual reference that designers can use to share their ideas with clients, team members, or stakeholders. Sketches make it easier to explain design concepts, gather feedback, and ensure everyone is on the same page. This visual communication can streamline the approval process and facilitate more effective collaboration.
Enhancing Creativity and Innovation
The act of sketching stimulates creativity by engaging the brain in a different way than working on a computer. It encourages a more tactile and intuitive approach to design, which can lead to unexpected and innovative solutions. The simplicity of sketching removes the distractions and limitations of digital tools, allowing designers to focus solely on their ideas. This unencumbered creative process often results in more original and inventive logo designs.
Documentation and Reference
Sketches serve as a visual record of the design process, documenting the evolution of ideas from initial concept to final execution. This documentation can be valuable for future reference, providing insights into the creative journey and the rationale behind design decisions. It also serves as a portfolio of ideas that can be revisited or repurposed for future projects.
Building a Strong Foundation
Ultimately, sketching lays the groundwork for a successful logo design. It ensures that the designer has thoroughly explored and vetted their ideas before moving to the digital phase. This strong foundation helps to prevent issues later in the process and ensures that the final logo is well-conceived and thoughtfully executed. By investing time in sketching, designers can create logos that are not only visually appealing but also strategically aligned with the brand’s goals and values.
Gathering Inspiration and Researching Trends

Gathering inspiration and researching trends are critical steps in the logo design process. These activities help designers understand the current design landscape, draw ideas from diverse sources, and ensure their work is relevant and innovative. Here’s how you can effectively gather inspiration and research trends:
Exploring Diverse Sources for Inspiration
Inspiration can come from anywhere, and the more diverse the sources, the richer the creative pool. Look beyond the obvious design resources. Art galleries, nature, architecture, fashion, and even everyday objects can spark ideas. Visiting museums, browsing through design books, and observing your surroundings can provide unique perspectives and unexpected design elements.
Leveraging Online Platforms and Communities
The internet is a treasure trove of inspiration. Platforms like Behance, Dribbble, Pinterest, and Instagram offer endless examples of creative work. Follow influential designers, explore curated collections, and join design communities to stay updated with the latest trends. Engaging with these communities can also provide valuable feedback and insights from peers.
Analyzing Competitor Logos
Studying competitor logos can provide insights into what works and what doesn’t within a specific industry. Analyze their designs to understand common themes, colors, and styles. This analysis helps identify gaps and opportunities to differentiate your logo. While it’s important not to copy, understanding the competitive landscape ensures your design is unique and stands out.
Keeping Up with Design Trends
Design trends evolve, and staying updated ensures your logo feels contemporary and relevant. Follow design blogs, subscribe to industry newsletters, and attend design conferences or webinars. Trends in typography, color schemes, minimalism, and other design elements can influence your work and inspire fresh ideas. However, balance trends with timeless design principles to avoid creating something that quickly becomes outdated.
Studying Historical Logos
Looking back at historical logos can provide a wealth of inspiration. Iconic logos that have stood the test of time often embody principles of good design. Study how these logos have evolved and adapted over the years. Understanding the historical context and design decisions behind these logos can offer valuable lessons for creating enduring designs.
Understanding the Client’s Brand and Audience
Gathering inspiration should always be aligned with the client’s brand identity and target audience. Conduct thorough research to understand the brand’s values, mission, and vision. Look at how the brand is positioned in the market and who their competitors are. Additionally, gain insights into the target audience’s preferences and behaviors. This research ensures that your design resonates with both the brand and its audience.
Creating a Mood Board
A mood board is an excellent tool for compiling and organizing inspiration. Collect images, color palettes, typography examples, and other visual elements that reflect the desired aesthetic. A mood board helps clarify the visual direction and serves as a reference throughout the design process. It can also be shared with clients to ensure alignment on the creative vision before moving forward.
Synthesizing Inspiration into Unique Ideas
The goal of gathering inspiration and researching trends is not to replicate but to innovate. Use the insights gained from your research to spark original ideas. Combine elements from different sources to create something new and unique. Sketching out initial concepts based on your inspiration can help translate these ideas into tangible designs.
Avoiding Over-reliance on Trends
While staying updated with trends is important, it’s crucial not to become overly reliant on them. Trends can be fleeting, and a logo should have a timeless quality. Use trends as a source of inspiration but focus on creating a design that embodies the brand’s core values and can endure changing tastes.
Brainstorming and Idea Generation Techniques

Brainstorming and idea generation are crucial stages in the logo design process. These activities help designers come up with a broad range of concepts, ensuring the final design is both innovative and reflective of the brand’s identity. Here are some effective techniques for brainstorming and generating ideas:
Mind Mapping for Concept Development
Mind mapping is a visual brainstorming technique that involves writing down a central concept and branching out related ideas. Start with the brand name or core value at the center and draw branches to different words, images, or themes that come to mind. This technique helps to explore various aspects of the brand and identify potential design elements that can be incorporated into the logo.
Word Association and Freewriting
Word association involves writing down words that are connected to the brand or its industry. Begin with a primary word related to the brand and jot down any words that come to mind. Freewriting is similar but involves writing continuously for a set period, allowing thoughts to flow without judgment. Both techniques help uncover unexpected connections and ideas that might not surface through structured thinking.
Sketch Storming for Visual Exploration
Sketch storming combines brainstorming with sketching. Set a timer and sketch as many logo ideas as possible within that period. The goal is to generate a large volume of rough sketches without worrying about perfection. This method encourages creativity and helps to quickly visualize different concepts, providing a pool of ideas to refine later.
SCAMPER Technique for Creative Thinking
The SCAMPER technique involves asking questions based on seven prompts: Substitute, Combine, Adapt, Modify, Put to another use, Eliminate, and Reverse. Apply these prompts to existing logos or design elements to generate new ideas. For example, consider what elements could be substituted or combined to create a unique logo. This structured approach stimulates creative thinking and can lead to innovative concepts.
Collaborative Brainstorming Sessions
Collaborative brainstorming sessions involve gathering a group of people to generate ideas together. This can include other designers, team members, or even the client. Each participant brings a different perspective, leading to a diverse range of ideas. Techniques like round-robin brainstorming, where each person contributes one idea at a time, or brainwriting, where ideas are written down and passed around, can be particularly effective.
Using Mood Boards for Inspiration
Creating a mood board involves collecting and arranging images, colors, typography, and other visual elements that convey the desired aesthetic and feeling of the logo. This visual reference can inspire new ideas and help to clarify the design direction. Reviewing and discussing the mood board with team members or clients can also generate additional concepts and refine the overall vision.
Reverse Engineering Existing Logos
Reverse engineering involves analyzing successful logos within the same industry or beyond. Break down these logos to understand their design principles, color schemes, typography choices, and overall composition. By understanding what makes these logos effective, you can apply similar principles to your own designs, while still creating something unique.
Utilizing Random Word and Image Generators
Online random word and image generators can spark creativity by introducing unexpected elements into the brainstorming process. Use these tools to generate random prompts related to the brand, and then brainstorm how these elements could be incorporated into the logo. This method can lead to innovative and unconventional ideas that might not arise through traditional brainstorming.
Storytelling to Generate Ideas
Storytelling involves creating a narrative around the brand and its values. Imagine the brand as a character and develop a story that highlights its journey, challenges, and triumphs. This narrative can uncover unique themes and symbols that can be incorporated into the logo design, adding depth and meaning to the final concept.
Setting Constraints to Foster Creativity
Sometimes, imposing constraints can actually enhance creativity. Set specific limitations, such as using only two colors or designing with geometric shapes, to challenge yourself and think outside the box. Constraints force you to find creative solutions within the given parameters, often leading to more innovative and focused designs.
By employing these brainstorming and idea generation techniques, designers can develop a wide array of logo concepts. This ensures that the final design is not only visually appealing but also thoughtfully conceived, reflecting the brand’s identity and values.
Tools and Materials for Effective Sketching
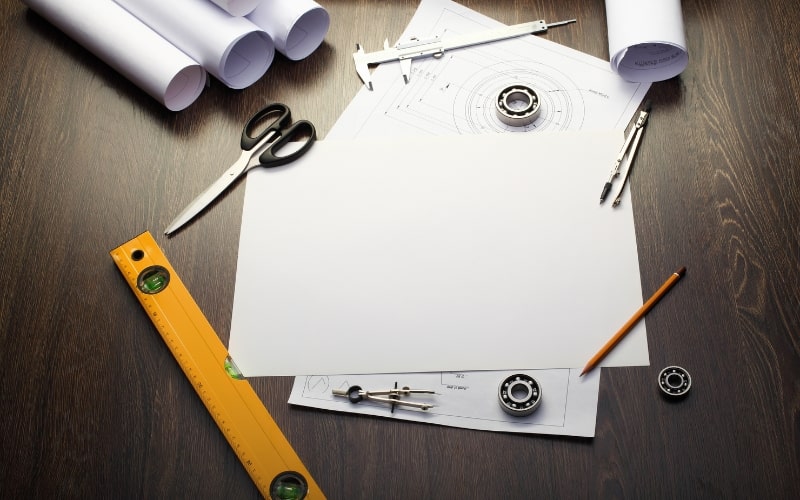
Having the right tools and materials is essential for effective sketching in the logo design process. The quality and variety of your tools can significantly impact your creative output and the ease with which you can translate ideas onto paper. Here’s a comprehensive guide to the tools and materials that can enhance your sketching process:
Traditional Sketching Tools
Pencils and Mechanical Pencils
Graphite Pencils: Graphite pencils are available in different grades, from hard (H) to soft (B). A range of these pencils can help you create varying line weights and shades.
Mechanical Pencils: These provide consistent line widths and are great for detailed work. They eliminate the need for sharpening, making them convenient for on-the-go sketching.
Erasers
Kneaded Erasers: These are pliable and can be shaped to erase fine details without leaving residue.
Vinyl Erasers: These are more rigid and effective for removing larger areas of graphite.
Sharpener
A quality sharpener is essential for maintaining a fine point on your pencils, which is crucial for detailed sketching.
Pens and Markers
Fine Liners: Pens with different tip sizes (e.g., 0.1, 0.3, 0.5) are excellent for outlining and adding fine details to sketches.
Brush Pens: These provide a range of line weights and are useful for adding dynamic, expressive lines.
Paper and Sketchbooks
Sketchbooks: Choose sketchbooks with high-quality, acid-free paper to ensure your sketches last without yellowing or deteriorating. Spiral-bound sketchbooks lie flat, providing a comfortable drawing surface.
Loose Sheets: Sometimes, loose sheets of paper are preferable for larger or more detailed sketches. Having a range of paper sizes and textures can offer different drawing experiences.
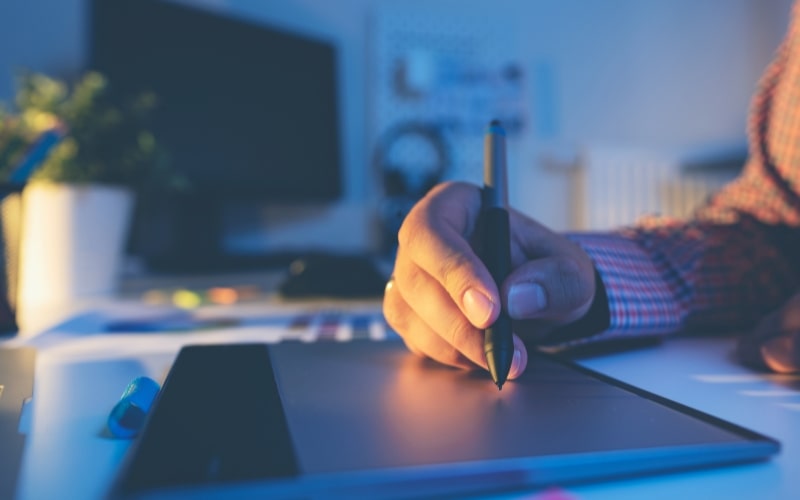
Digital Sketching Tools
Graphic Tablets
Pen Tablets: Devices like the Wacom Intuos allow for precise control and pressure sensitivity, making digital sketching feel natural.
Pen Displays: Tablets with built-in screens, such as the Wacom Cintiq or Huion Kamvas, provide a direct drawing experience similar to sketching on paper.
Stylus Pens
Stylus pens with pressure sensitivity and tilt recognition, like the Apple Pencil or the Wacom Pro Pen, enhance the digital sketching experience by mimicking the behavior of traditional drawing tools.
Sketching Software
Adobe Illustrator and Photoshop: These industry-standard programs offer robust tools for sketching, including customizable brushes and layers for easy editing.
Procreate: A popular app for iPad users, Procreate provides a wide range of brushes, intuitive gesture controls, and powerful features tailored for digital artists.
CorelDRAW and SketchBook Pro: These programs also offer powerful sketching tools, with features designed specifically for illustrators and designers.
Additional Materials
Rulers and Templates
Rulers, French curves, and circle templates help in creating precise geometric shapes and lines, which are often essential in logo design.
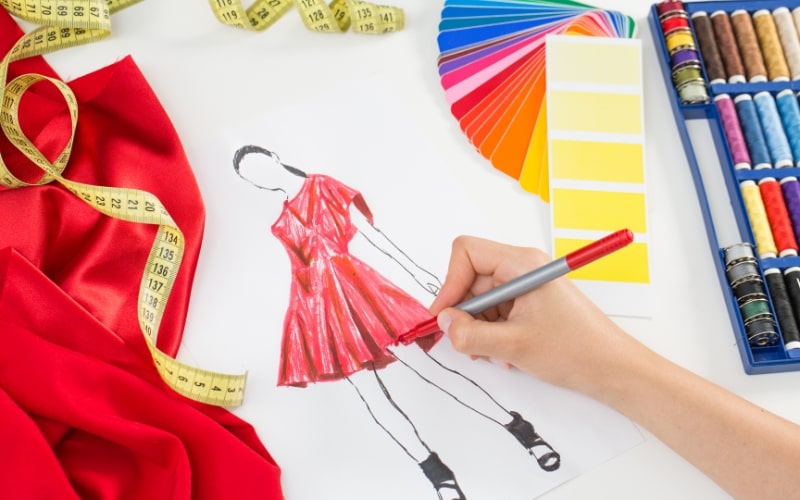
Colored Pencils and Markers
Adding color to your sketches can help visualize the final logo more clearly. Colored pencils and markers allow for easy shading and highlighting.
Tracing Paper
Tracing paper is invaluable for refining sketches. It allows you to overlay different versions and make adjustments without redrawing the entire sketch.
Light Box
A light box can help you trace and refine sketches by illuminating the layers underneath, making it easier to focus on specific details.
Maintaining Your Tools
Proper maintenance of your tools ensures their longevity and optimal performance. Keep your pencils sharp, pens capped, and digital stylus charged. Regularly clean your sketchbooks and replace worn-out tools to maintain a smooth workflow.
By equipping yourself with the right tools and materials, you can enhance your sketching process and bring your logo design ideas to life with precision and creativity. Whether you prefer traditional methods or digital techniques, having a well-stocked toolkit is essential for effective and efficient sketching.
Developing Initial Rough Sketches
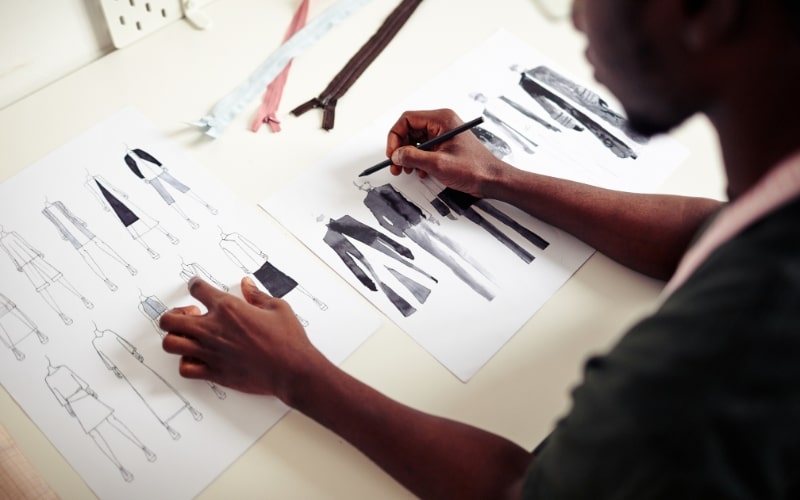
Developing initial rough sketches is a crucial step in the logo design process. This phase is about translating your brainstorming ideas and inspiration into tangible forms. It’s a stage where quantity often trumps quality, and the focus is on exploring a wide range of concepts. Here’s how to approach developing initial rough sketches effectively:
Embrace Imperfection
The purpose of rough sketches is to explore ideas quickly and without the pressure of perfection. Use loose, swift strokes to capture the essence of your ideas. Don’t worry about making mistakes or creating perfect lines; the goal is to generate as many concepts as possible. This approach allows your creativity to flow freely and helps uncover potential directions for your logo design.
Start with Simple Shapes
Begin your sketches with basic shapes and forms. Simple shapes like circles, squares, and triangles can serve as the foundation for more complex designs. These shapes help to establish the overall structure and balance of your logo. Experiment with different combinations and variations to see how they impact the visual appeal and readability of the logo.
Explore Multiple Concepts
Aim to create multiple sketches for each concept. This could mean drawing the same idea from different angles, varying the proportions, or experimenting with different styles. By exploring multiple iterations, you can better understand the strengths and weaknesses of each concept and identify the most promising directions to pursue further.
Focus on Key Elements
Identify the key elements that define your logo, such as symbols, typography, and overall composition. Concentrate on how these elements interact and complement each other. For instance, if your logo includes a symbol and text, explore how they can be arranged together in harmonious ways. Try different placements, alignments, and scales to find the most effective combination.
Use Visual Hierarchy
Visual hierarchy helps to guide the viewer’s eye through the logo and emphasize the most important elements. During the rough sketching phase, experiment with different ways to create hierarchy. This can be achieved through size, color contrast, and positioning. Ensure that the primary message of the logo is clear and prominent, while secondary elements support and enhance the overall design.
Incorporate Feedback
If you’re working with a team or client, share your rough sketches to gather feedback. Presenting a variety of concepts allows others to provide input and highlight which directions resonate most. Constructive feedback at this stage can save time and effort later by ensuring that you’re on the right track before moving on to more refined sketches.
Iterate Quickly
The rough sketching phase should be fast-paced. Set a timer for each sketch session to encourage quick thinking and prevent over-analysis. This helps maintain momentum and prevents getting stuck on a single idea. The goal is to generate a broad spectrum of ideas that can be narrowed down and refined in subsequent stages.
Stay Open to New Ideas
As you develop rough sketches, remain open to new ideas that may arise. Sometimes, unexpected concepts emerge during the sketching process that can lead to innovative and unique designs. Don’t be afraid to diverge from your initial plan and explore these new directions.
Document Your Progress
Keep a record of all your rough sketches, even those that seem less promising. Documenting your progress provides a visual history of your design process and can offer valuable insights into your creative journey. It also ensures that no idea is lost and can be revisited or refined later.
Evaluate and Select
Once you have a substantial collection of rough sketches, take the time to evaluate them. Look for concepts that stand out and align with the brand’s identity and goals. Select a few of the most promising sketches to refine and develop further. This selection process helps to narrow down your options and focus on the best ideas.
By following these guidelines, you can effectively develop initial rough sketches that serve as the foundation for a successful logo design. This phase is about exploration, creativity, and laying the groundwork for more refined and polished designs.
Refining and Iterating on Your Sketches
Once you have developed your initial rough sketches, the next step is refining and iterating on them to create a polished and effective logo design. This phase involves narrowing down your ideas, enhancing the details, and ensuring the design aligns with the brand’s identity and goals. Here’s how to refine and iterate on your sketches effectively:
Evaluate Your Initial Sketches
Begin by reviewing all your rough sketches. Identify the concepts that best capture the brand’s essence and have the most potential. Look for designs that stand out, are visually appealing, and align with the brand’s message. Set aside sketches that don’t meet these criteria and focus on the most promising ones.
Gather Feedback
Sharing your refined sketches with others can provide valuable insights. Whether it’s with team members, clients, or other designers, constructive feedback can highlight strengths and weaknesses you might have overlooked. Consider organizing a feedback session where participants can discuss what they like and suggest improvements. This collaborative approach ensures that the final design resonates with a broader audience.
Focus on Details and Precision
As you move from rough sketches to refined drawings, pay attention to the details. Clean up any messy lines and ensure that shapes are precise and proportions are accurate. This step is about enhancing the clarity and quality of your design. Use tools like rulers, French curves, or digital drawing software to achieve precise and clean lines.
Experiment with Variations
Create multiple refined versions of your chosen concepts. Experiment with different variations, such as adjusting the size and placement of elements, tweaking the typography, and exploring alternative color schemes. These variations help you see how different adjustments impact the overall design and allow you to identify the most effective combination.
Simplify and Clarify
Effective logos are often simple and easily recognizable. During the refinement process, look for ways to simplify your design without losing its essence. Remove any unnecessary elements that don’t contribute to the overall message. Aim for a design that is clear, memorable, and easily identifiable at a glance.
Test for Scalability
A logo needs to work well across different sizes and mediums, from business cards to billboards. Test your refined sketches by scaling them up and down. Ensure that the design remains legible and maintains its integrity at various sizes. Simplifying complex elements and ensuring clean lines can help improve scalability.
Check for Versatility
Your logo should be versatile enough to work in different contexts, such as on different backgrounds and in various color schemes. Create versions of your refined sketches in black and white, grayscale, and color. Test them on different backgrounds to ensure they maintain their impact and readability. Versatility is key to a successful logo that works across various applications.
Refine Typography
If your logo includes text, pay close attention to the typography. Choose fonts that complement the design and are in line with the brand’s personality. Ensure that the text is legible at different sizes and distances. Experiment with different font styles, weights, and placements to find the most harmonious and effective combination.
Iterate and Repeat
Refinement is an iterative process. After making adjustments, take a step back and review the changes. Continuously seek feedback and make further refinements based on the input received. This cycle of refining and reviewing helps to gradually enhance the design and move closer to the final logo.
Finalize the Design
Once you have iterated on your sketches and are satisfied with the refined design, it’s time to finalize it. Create a clean, high-quality version of the logo, ensuring that all elements are polished and consistent. This final version should be ready for digital rendering and presentation to the client.
Document the Process
Documenting the refinement process provides a visual record of how your design evolved. This documentation can be useful for explaining your design decisions to the client and serves as a reference for future projects. It also highlights the effort and thought that went into creating the final logo.
Transitioning from Sketches to Digital Design
Transitioning from sketches to digital design is a pivotal phase in the logo design process. This stage involves converting your refined sketches into a digital format, where they can be further polished and perfected. Here’s a comprehensive guide on how to effectively transition your logo design from paper to digital:
Scanning or Photographing Your Sketches
Start by digitizing your refined sketches. Use a high-quality scanner to capture detailed images of your sketches. Ensure the resolution is high enough to capture all the fine lines and details. If a scanner is not available, you can use a camera or smartphone, but make sure the sketches are well-lit and the images are clear and straight.
Choosing the Right Software
Selecting the right software is crucial for digital design. Adobe Illustrator is a popular choice due to its robust vector graphic capabilities, which allow for scalability without losing quality. Other options include CorelDRAW, Affinity Designer, and Inkscape. Choose a program that you are comfortable with and that suits your design needs.
Setting Up Your Workspace
Once your sketches are digitized, set up your workspace in your chosen software. Create a new document with the appropriate dimensions and resolution. It’s often helpful to start with a larger canvas size to give yourself room to work, and then you can scale down as needed.
Importing and Tracing Your Sketches
Import your scanned sketches into the digital workspace. Use the software’s tracing tools to outline your sketches. In Illustrator, the Pen Tool is highly effective for creating precise vector paths. Carefully trace over your sketches, ensuring that you capture the essence and details of the original design. This step may require patience and precision, but it is crucial for creating a high-quality digital version.
Refining the Digital Outline
After tracing your sketches, refine the digital outline to ensure smooth, clean lines. Adjust anchor points and curves to remove any rough edges or inconsistencies. Use the software’s smoothing and path adjustment tools to achieve a polished look. This refinement process ensures that your logo will look professional and crisp in any size or format.
Adding Color and Effects
Once the outline is complete, it’s time to add color. Refer back to any color schemes you considered during the sketching phase. Use the color palette tools in your software to apply colors to different parts of your logo. Experiment with gradients, shadows, and other effects to enhance the visual appeal. Ensure that the colors are consistent with the brand’s identity and work well in various contexts.
Typography Integration
If your logo includes text, now is the time to integrate it. Choose fonts that complement the design and align with the brand’s personality. Use the software’s text tools to add and manipulate typography. Ensure that the text is legible and harmonizes with the graphic elements of the logo. Adjust kerning, leading, and font sizes as needed to achieve a balanced composition.
Testing Scalability and Versatility
One of the advantages of digital design is the ability to test scalability and versatility easily. Scale your logo up and down to ensure it maintains its integrity and readability at different sizes. Create black-and-white and grayscale versions to test how the logo performs without color. Check its appearance on different backgrounds and in various applications to ensure versatility.
Finalizing the Digital Design
Once you are satisfied with the digital version of your logo, finalize the design by making any last adjustments. Ensure all elements are aligned correctly and that the overall composition is balanced. Save the final version in multiple formats, such as AI, EPS, SVG, and PNG, to accommodate different usage scenarios.
Creating a Style Guide
To ensure consistent use of your logo, create a style guide that outlines the correct colors, typography, spacing, and usage rules. This guide will be a valuable resource for anyone using the logo in the future, ensuring that it always appears as intended.
Backing Up Your Work
Finally, back up your digital files to prevent loss. Save copies on different storage devices or cloud services to ensure that your work is secure and accessible.
Conclusion
Transitioning from sketches to digital design is the final, crucial phase in the logo design process. This stage not only transforms your ideas into a polished, professional logo but also ensures that your design is versatile, scalable, and ready for use across various platforms. By following the steps of digitizing your sketches, refining details, adding color, and testing for scalability, you create a logo that is both aesthetically pleasing and functional. Throughout this process, the importance of each preceding step becomes evident. From understanding the value of sketching and gathering inspiration to brainstorming, selecting the right tools, and refining your ideas, each phase builds on the last to create a cohesive and effective design. This methodical approach not only enhances creativity but also ensures that the final logo aligns with the brand’s identity and goals.
Incorporating these techniques into your design process can significantly improve the quality and impact of your logos. However, remember that a well-designed logo is just one component of a successful website. If you find that your website isn’t getting the traffic you expected, there may be other factors at play. Read more on the other reasons why your website isn’t getting traffic to ensure a comprehensive approach to your online presence. By thoroughly understanding and applying these steps, you can create logos that are not only visually appealing but also strategically effective, enhancing the overall success of your brand